in InToday

Practitioner guide · Allied health

Chart from an appointment

Create a clinical note directly from a client’s booked appointment, use a reusable template or structured assessment, and recognize when the chart is complete.

1

Open Charting

Work from the appointment page so the note stays connected to the visit.

2

Capture the visit

Start free text, choose a template, or add a structured assessment.

3

Finish deliberately

Save work in progress, or sign when the note is ready to finalize.

Before you begin

Open a booked appointment you are allowed to view and update. Your clinic’s service configuration determines whether a note and signature are required.
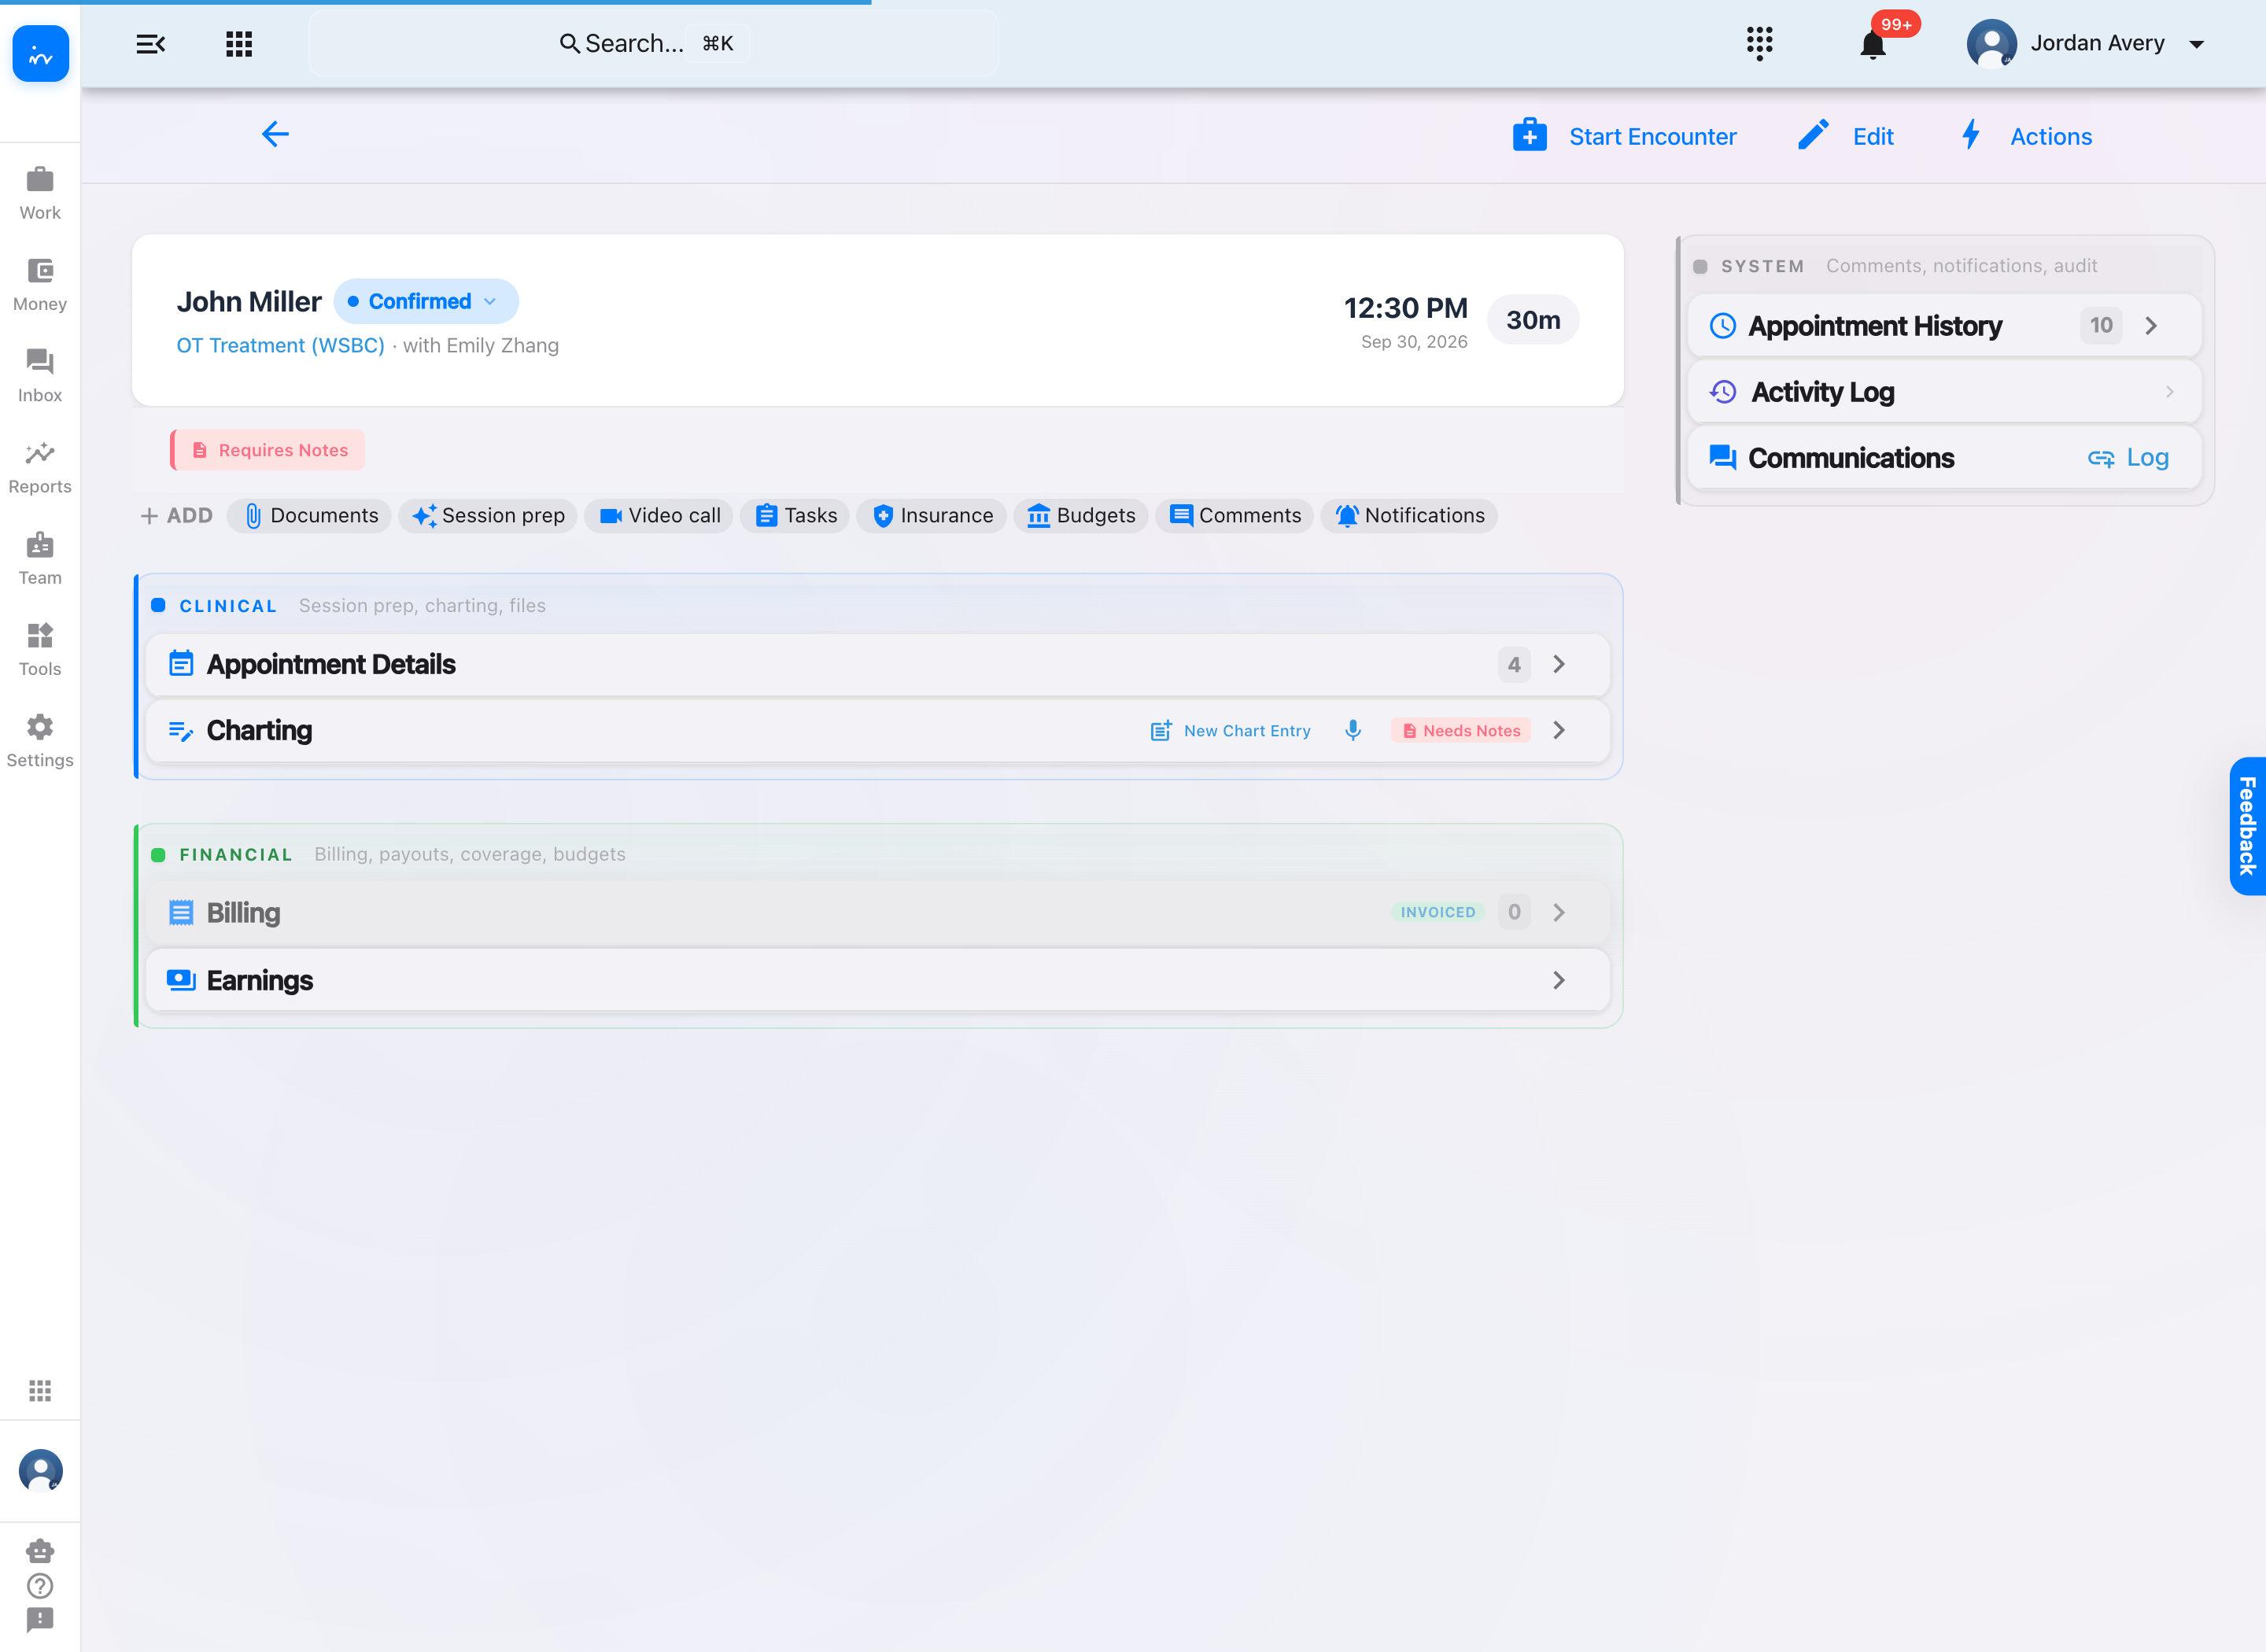
Find the workspace

Start in the appointment’s Charting section

Step 1 of 5
Occupational therapy appointment with the Charting section open
Check the requirementA red Requires Notes badge identifies unfinished charting for this visit.
Stay on the bookingThe Charting section keeps the new entry connected to the selected appointment.
Choose New Chart EntryThis opens the available starting points for the note.

Example occupational therapy appointment.

Free-text charting

Write a note and keep prior context in view

Step 2 of 5
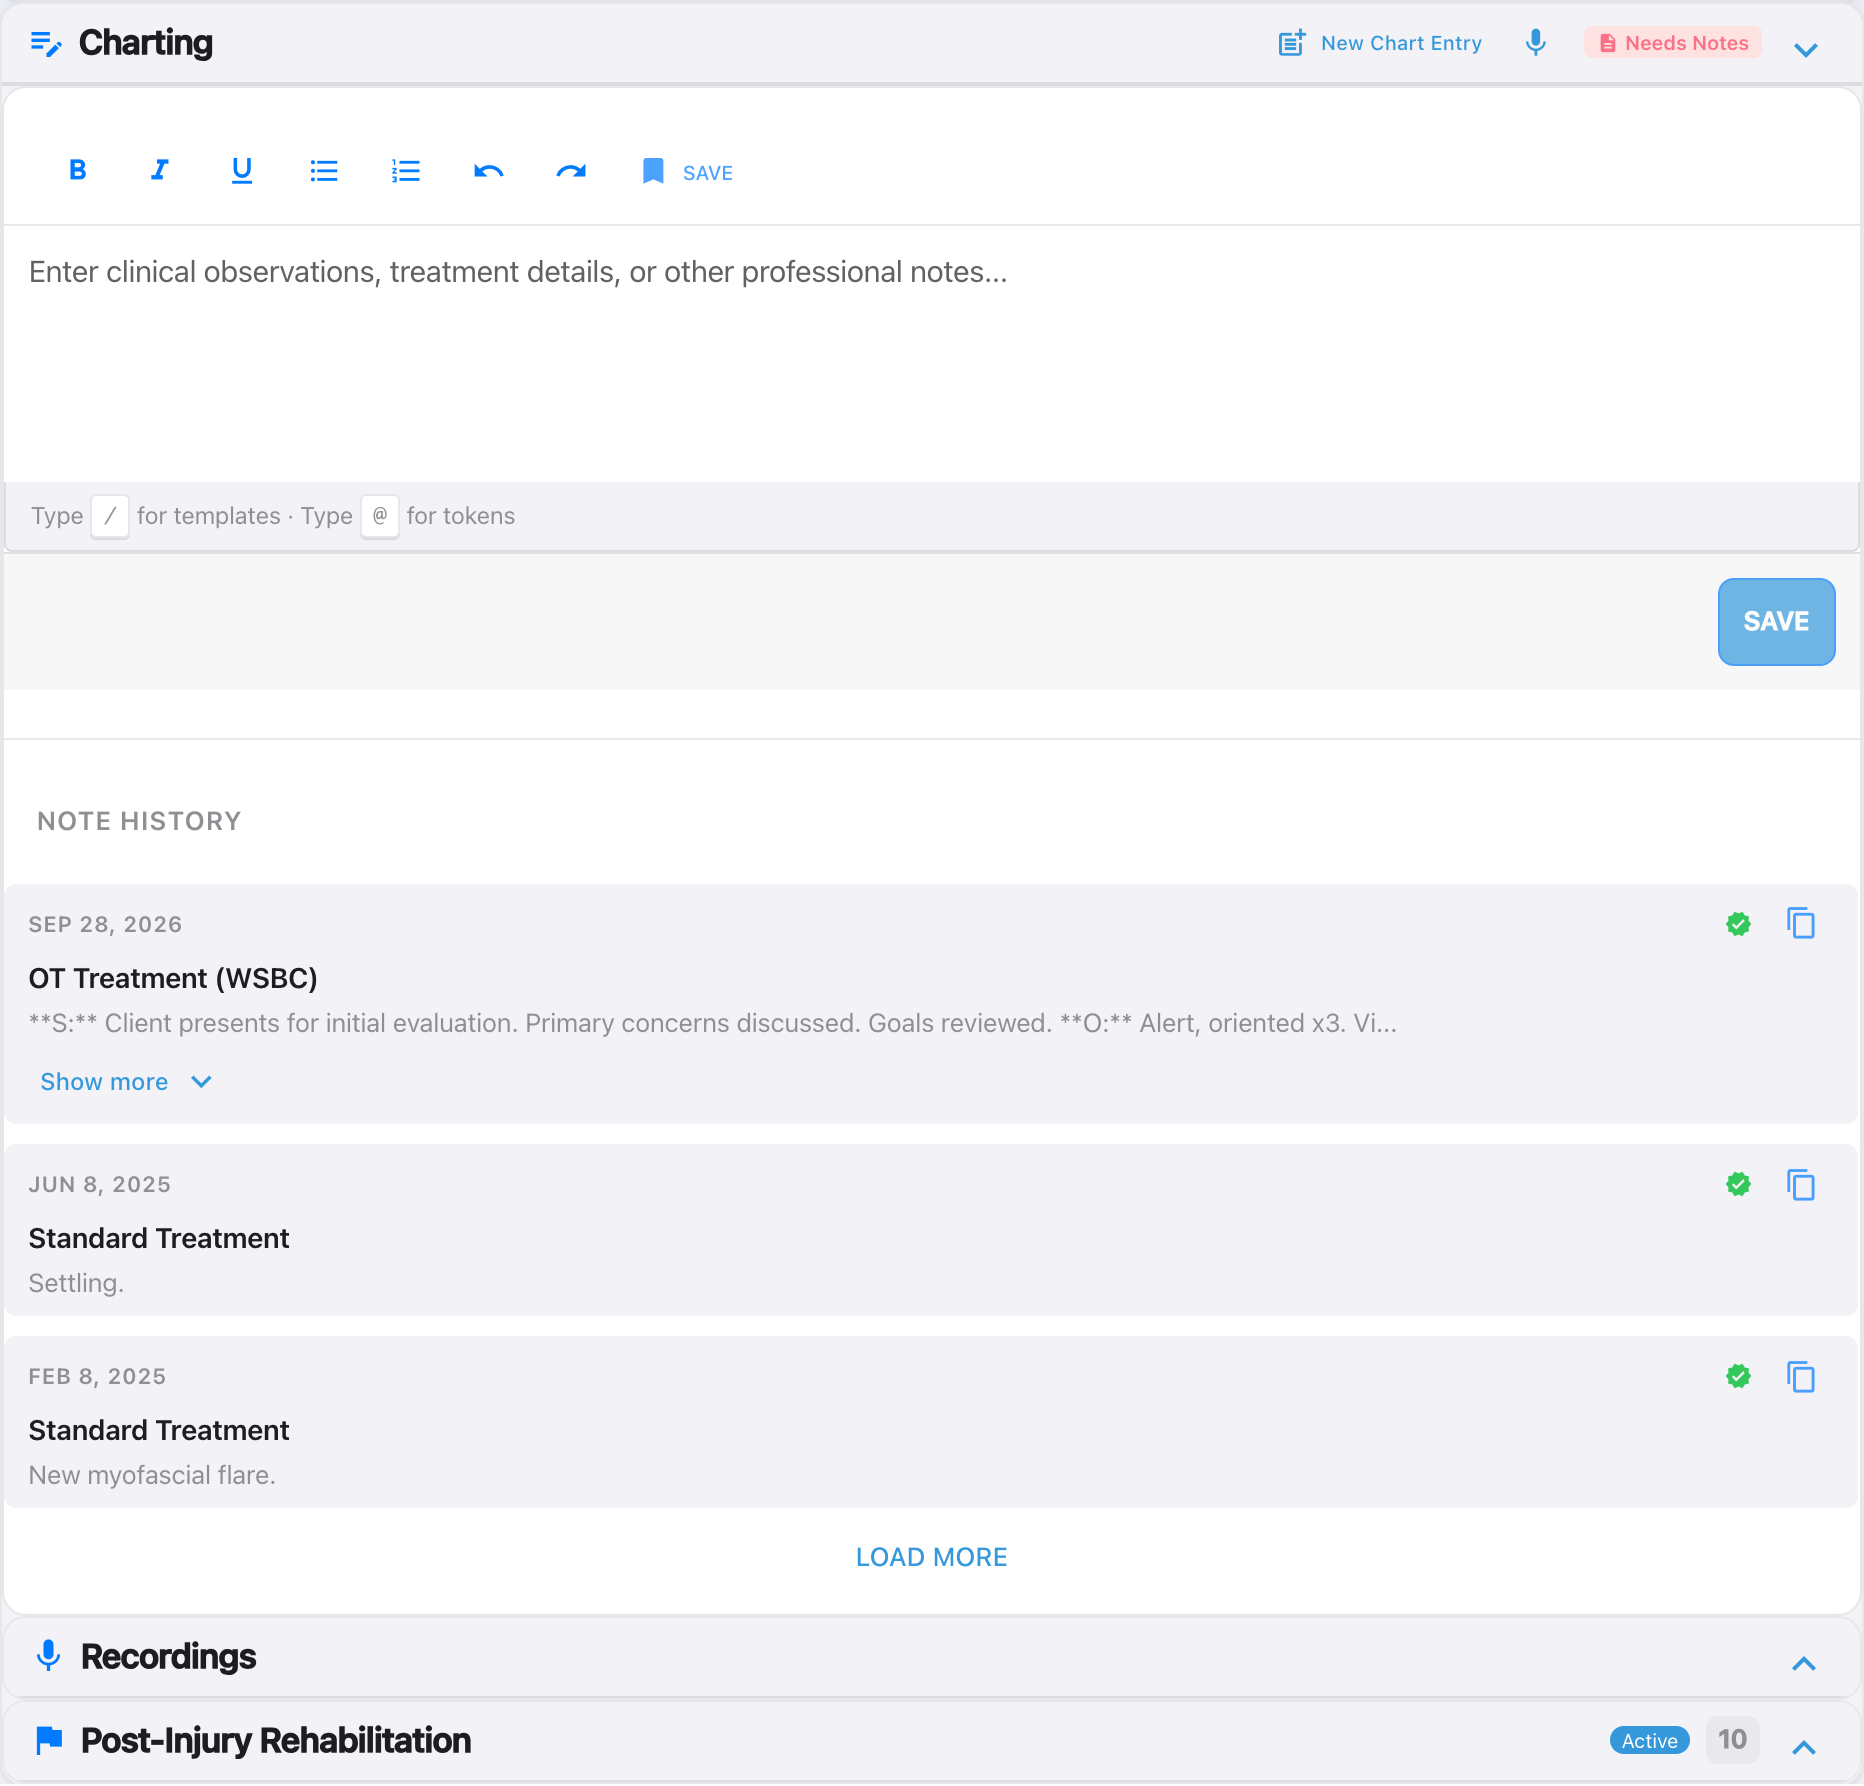
Free-text chart editor above previous chart entries

The editor and earlier entries appear together in the Charting section.

For an ad hoc note

  1. Select New Chart Entry.
  2. Choose Free-text note.
  3. Enter the clinically relevant details.
  4. Review before choosing a save action.

Use the history carefully

Earlier chart entries can provide context. Their completion icons belong to those earlier notes—not automatically to the appointment you are charting now.

Voice note

A microphone control may be available. Follow your clinic’s consent and privacy process whenever voice notes are used.

Reusable text

Start from a chart template

Step 3 of 5
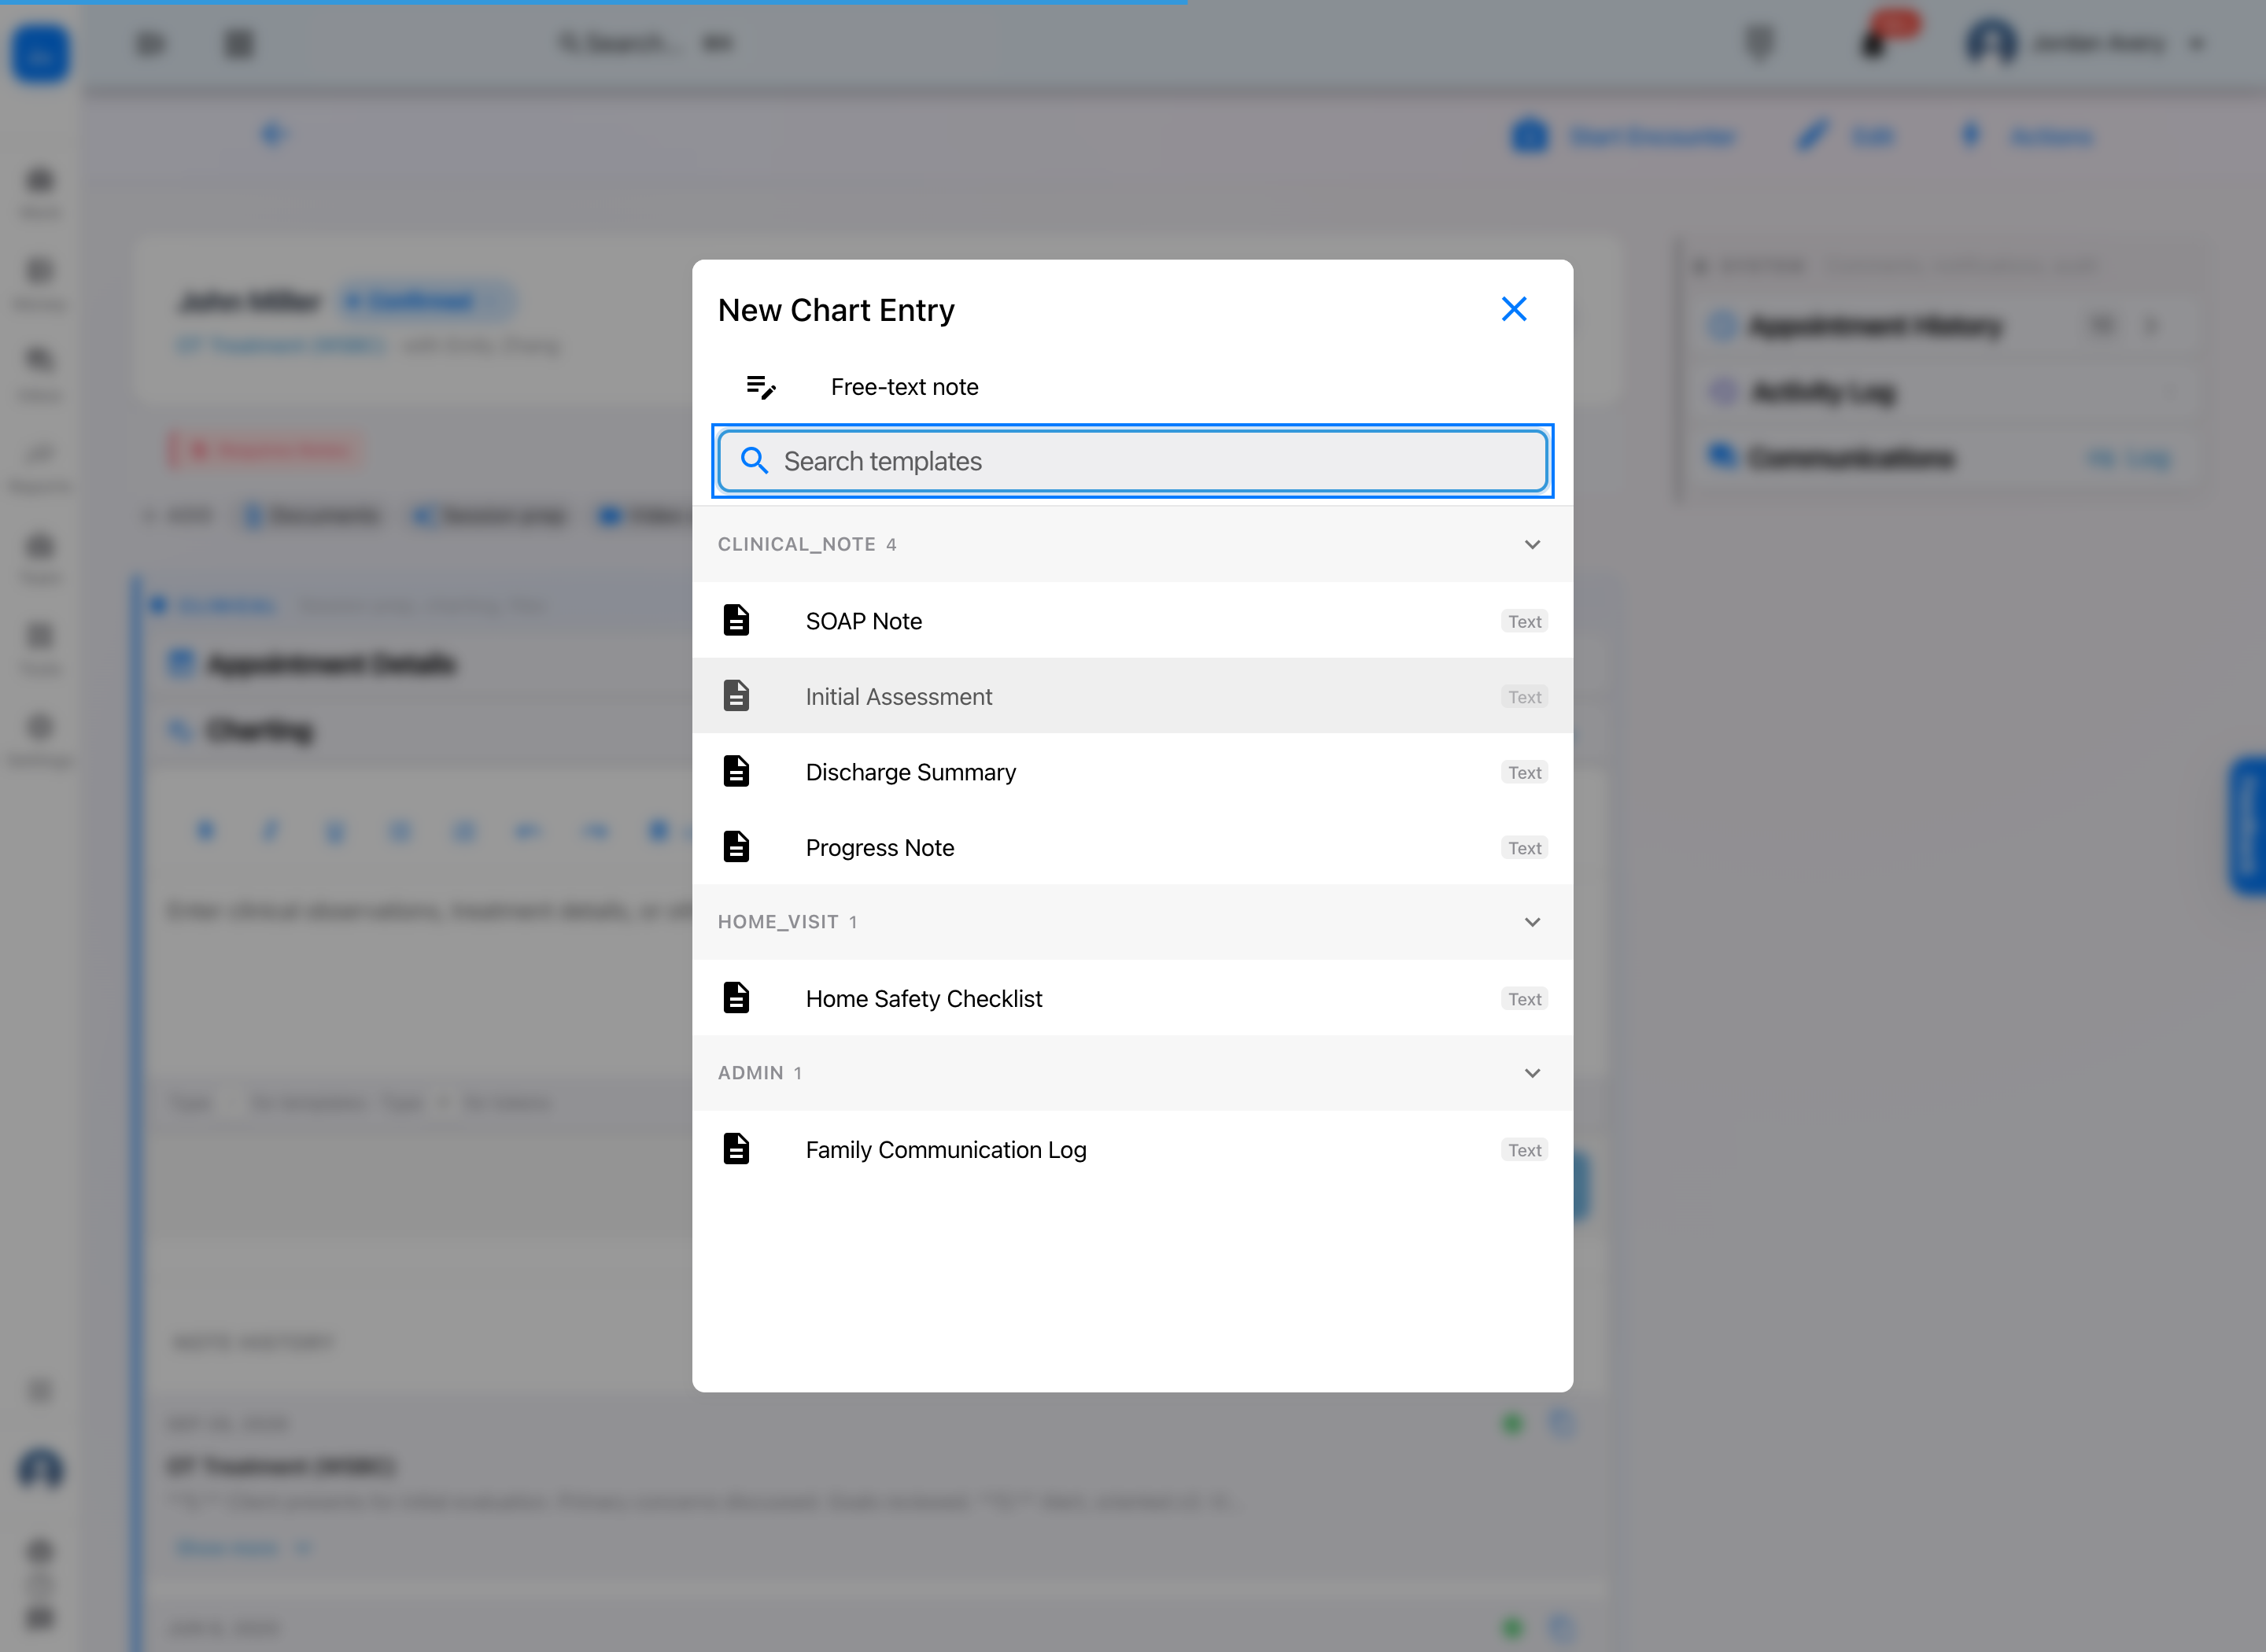
New Chart Entry window with text templates grouped by category

Choose a template

  1. Select New Chart Entry.
  2. Search by name, or browse the categories.
  3. Select the template that matches the visit.
  4. Review and personalize the inserted text.

Examples shown

SOAP Note, Initial Assessment, Discharge Summary, Progress Note, Home Safety Checklist, and Family Communication Log.

Your clinic’s available templates may differ.

Template ≠ finished note

A template gives you a consistent starting structure. Confirm every section reflects the current visit before saving or signing.
Structured observations

Insert an assessment from the editor

Step 4 of 5
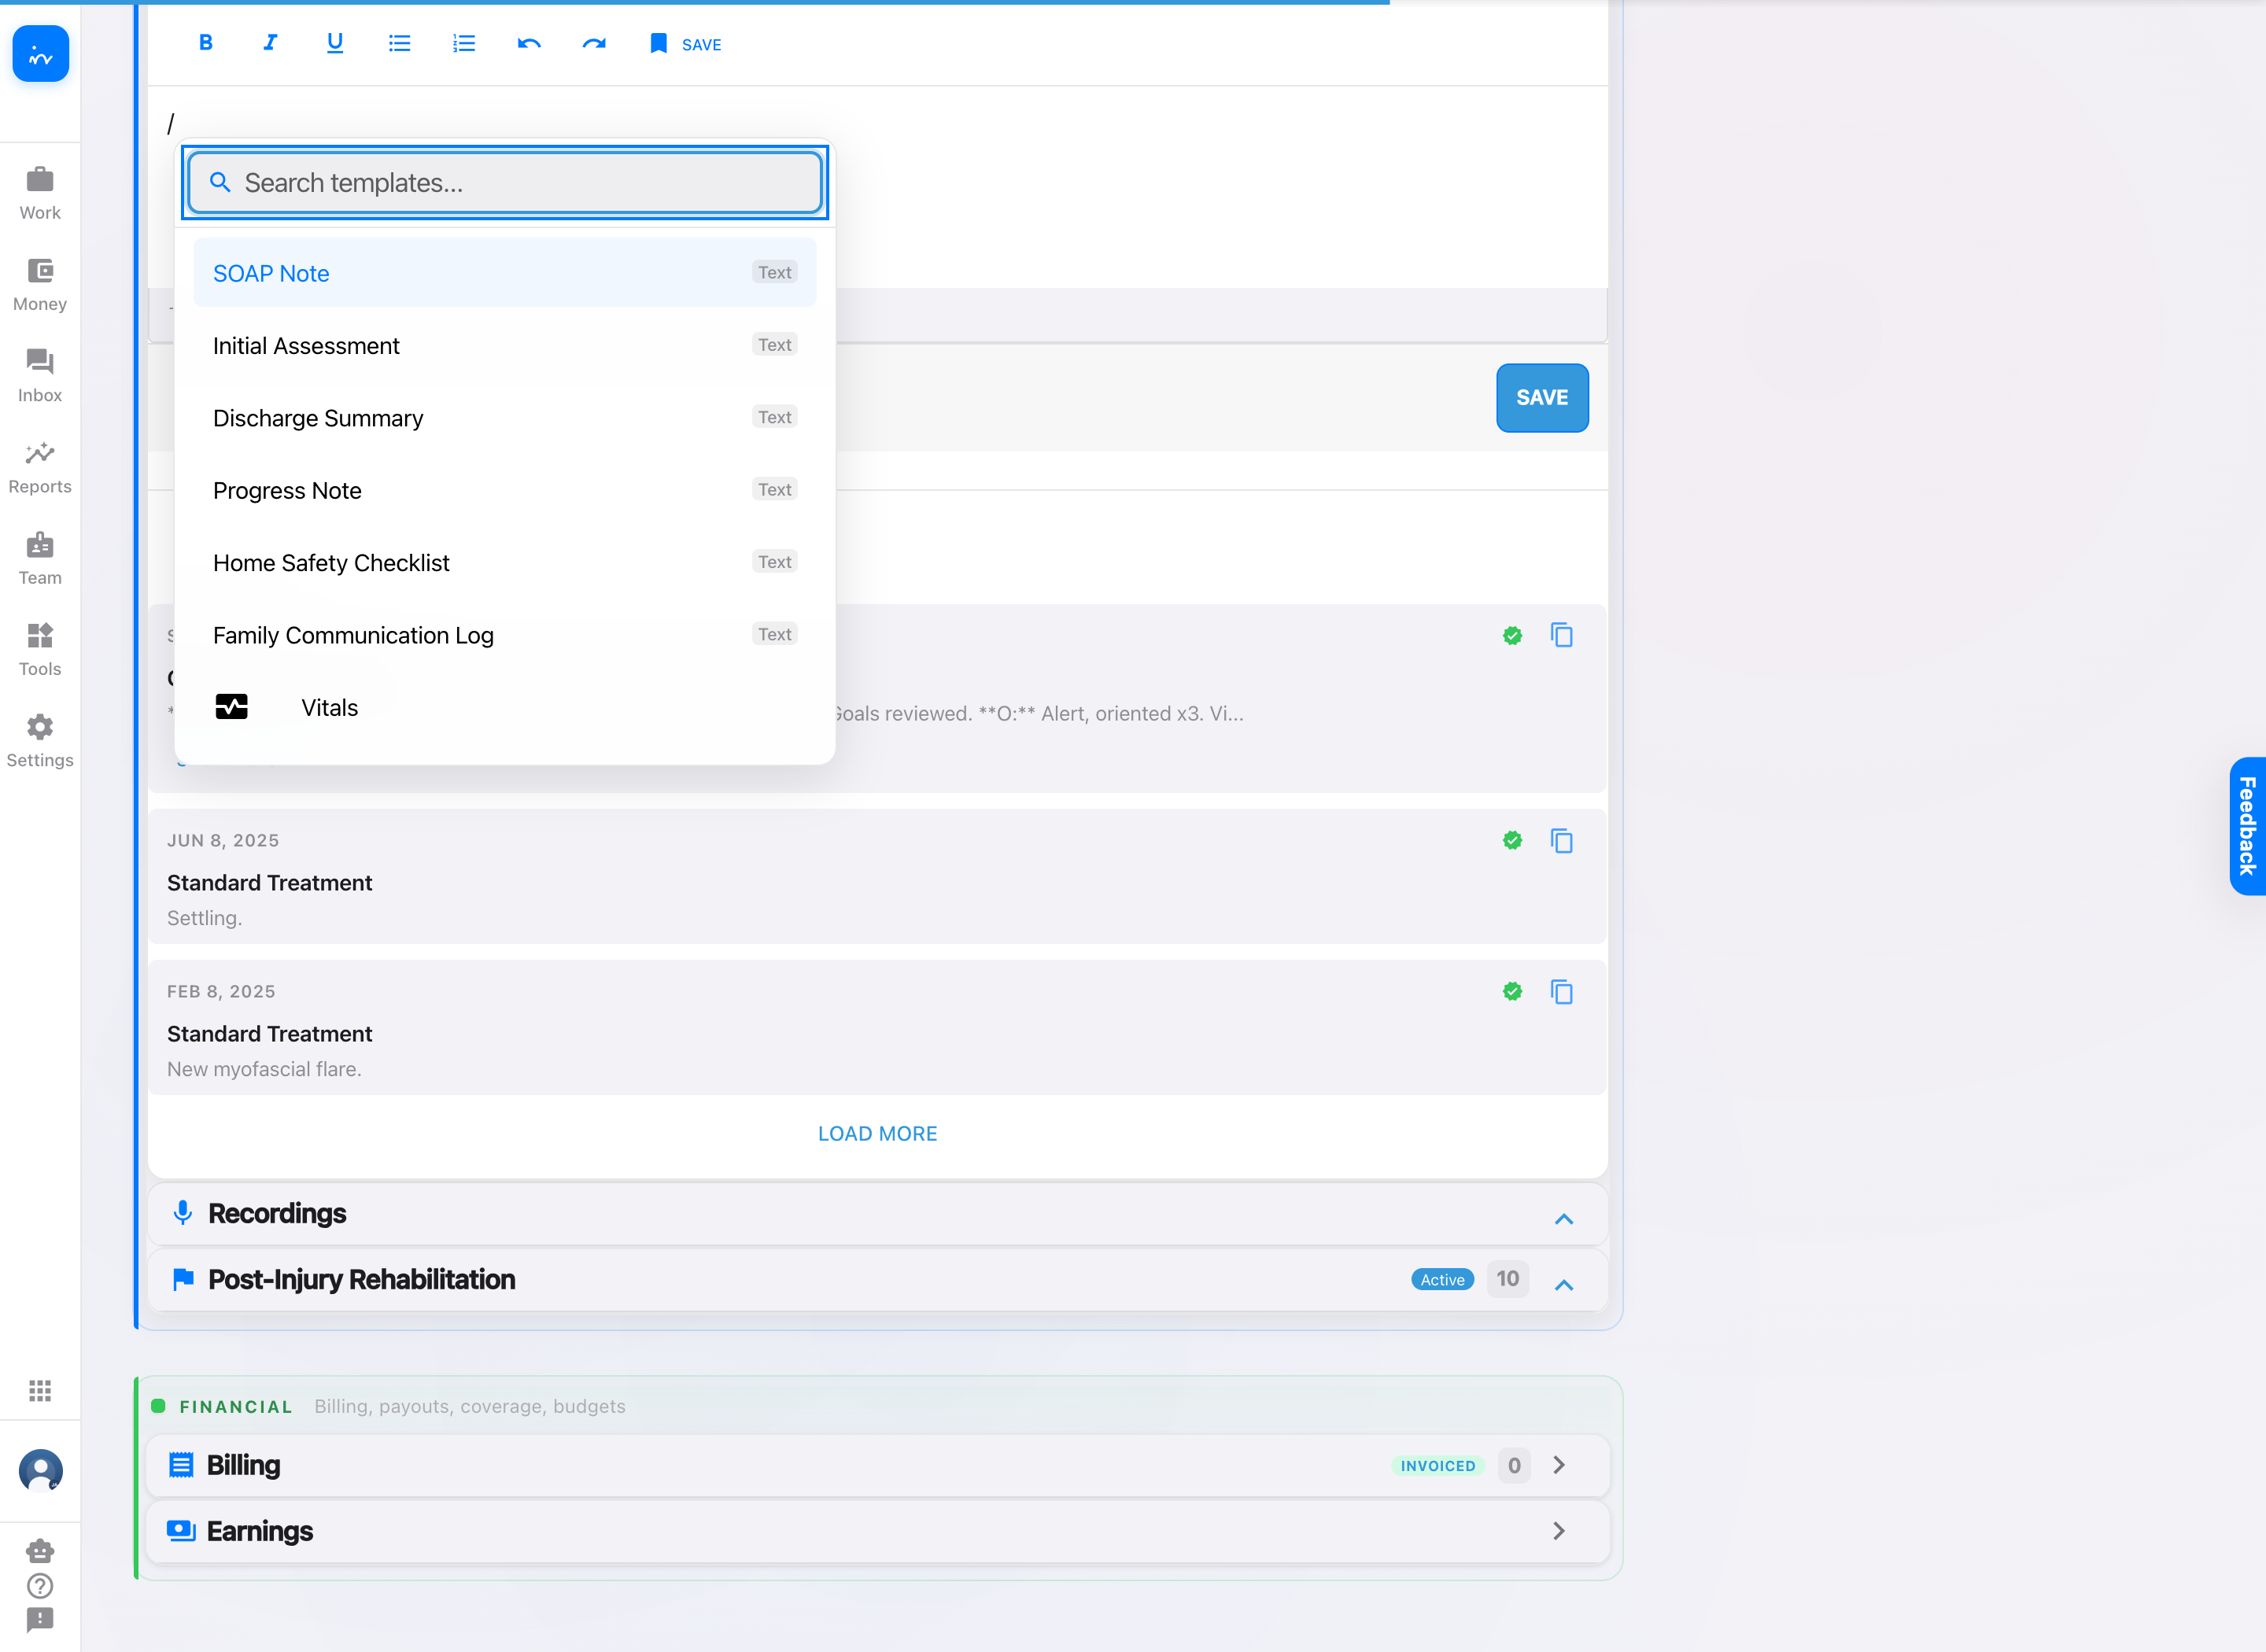
Chart editor command menu opened by typing slash

Type / in the editor to open the insertion menu.
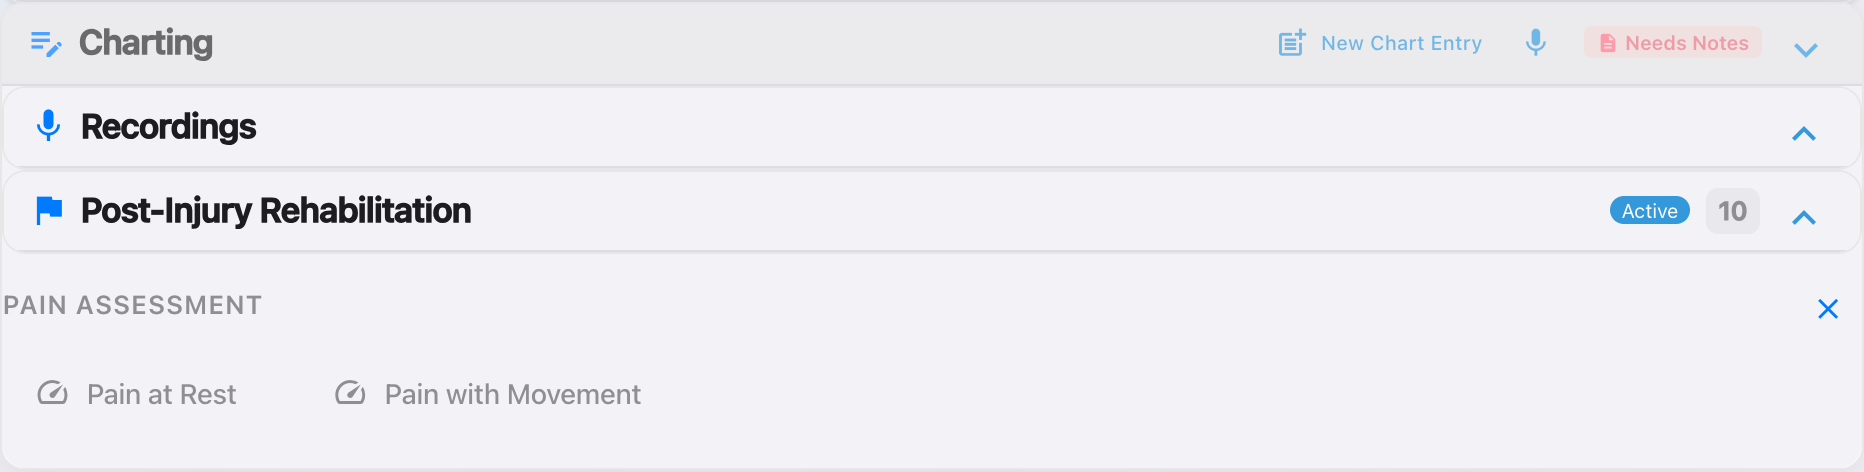
Pain assessment panel with pain at rest and pain with movement fields

Example: the Pain assessment opens structured fields inside the chart.

Open the menuPlace the cursor in the note and type /.
Pick the right toolOptions observed include vitals, pain, body chart, symptoms, treatment methods, photos, and goal progress.
Complete the fieldsEnter only the observations relevant to this visit, then review the complete chart.

Finish the chart

Choose the save action that matches your intent

Step 5 of 5
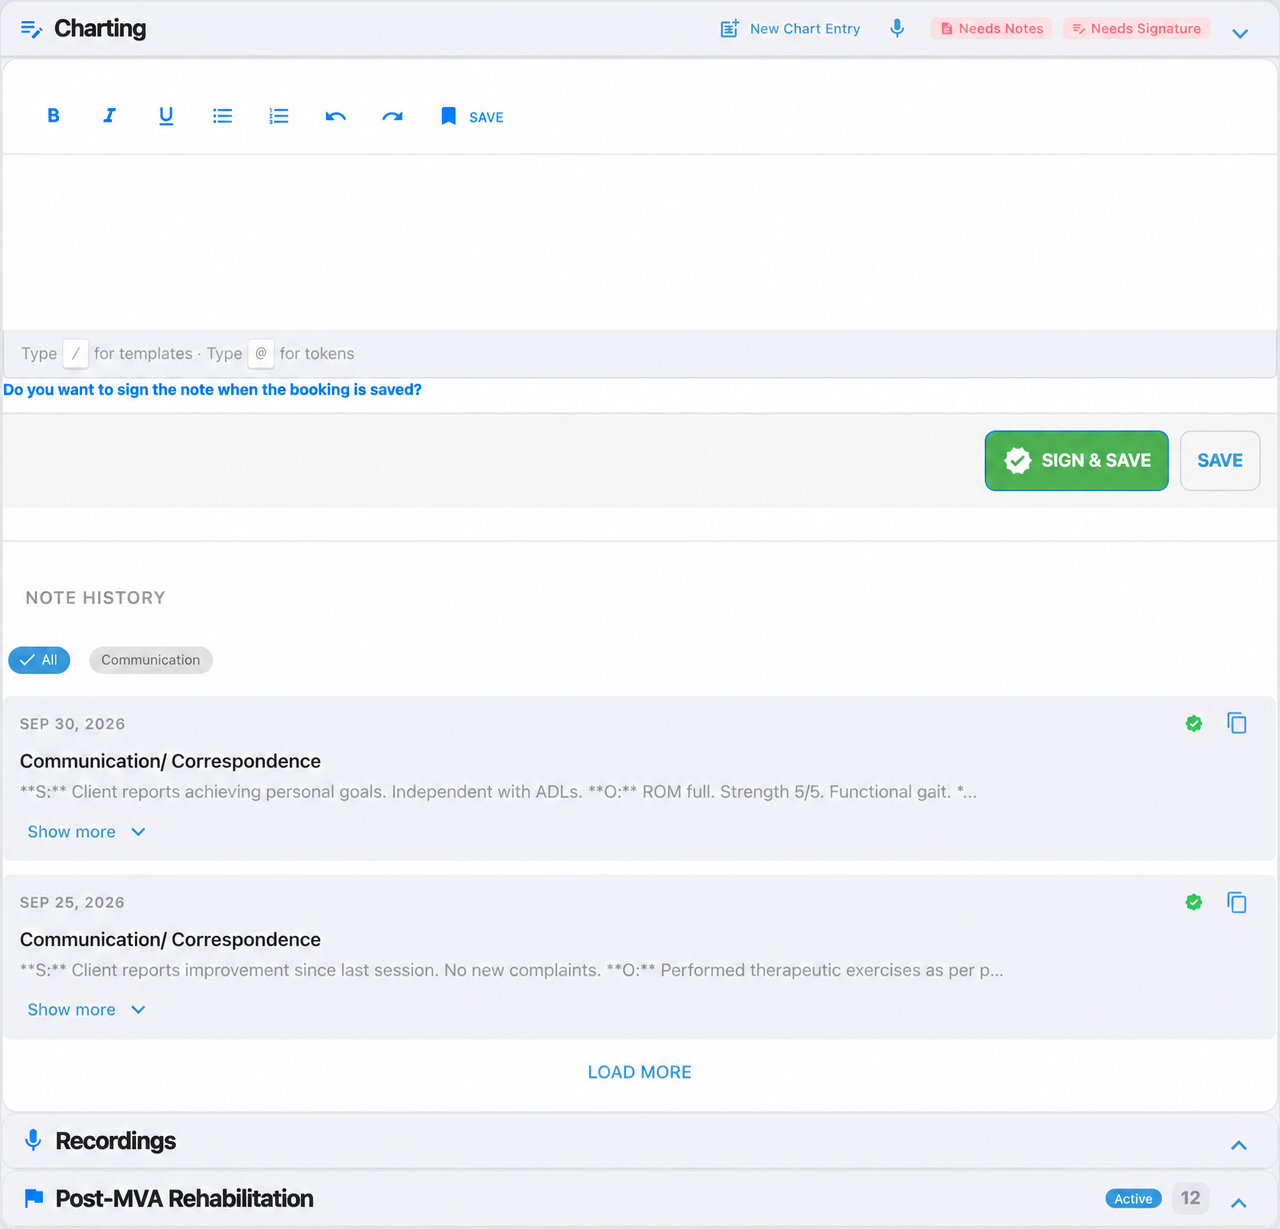
Chart editor showing Needs Notes, Needs Signature, Sign and Save, and Save controls

Read the status first

Needs Notes and Needs Signature identify what remains for this appointment.

Save

Use the separate save action when the entry is not ready to be finalized with a signature.

Sign & Save

Use this when the note is complete and ready to be finalized for a signature-required service.

Pause before signing

Confirm the visit, client, author, date, and content. A signed entry is locked in the appointment chart.

Confirm completion

Recognize a signed chart entry

Complete
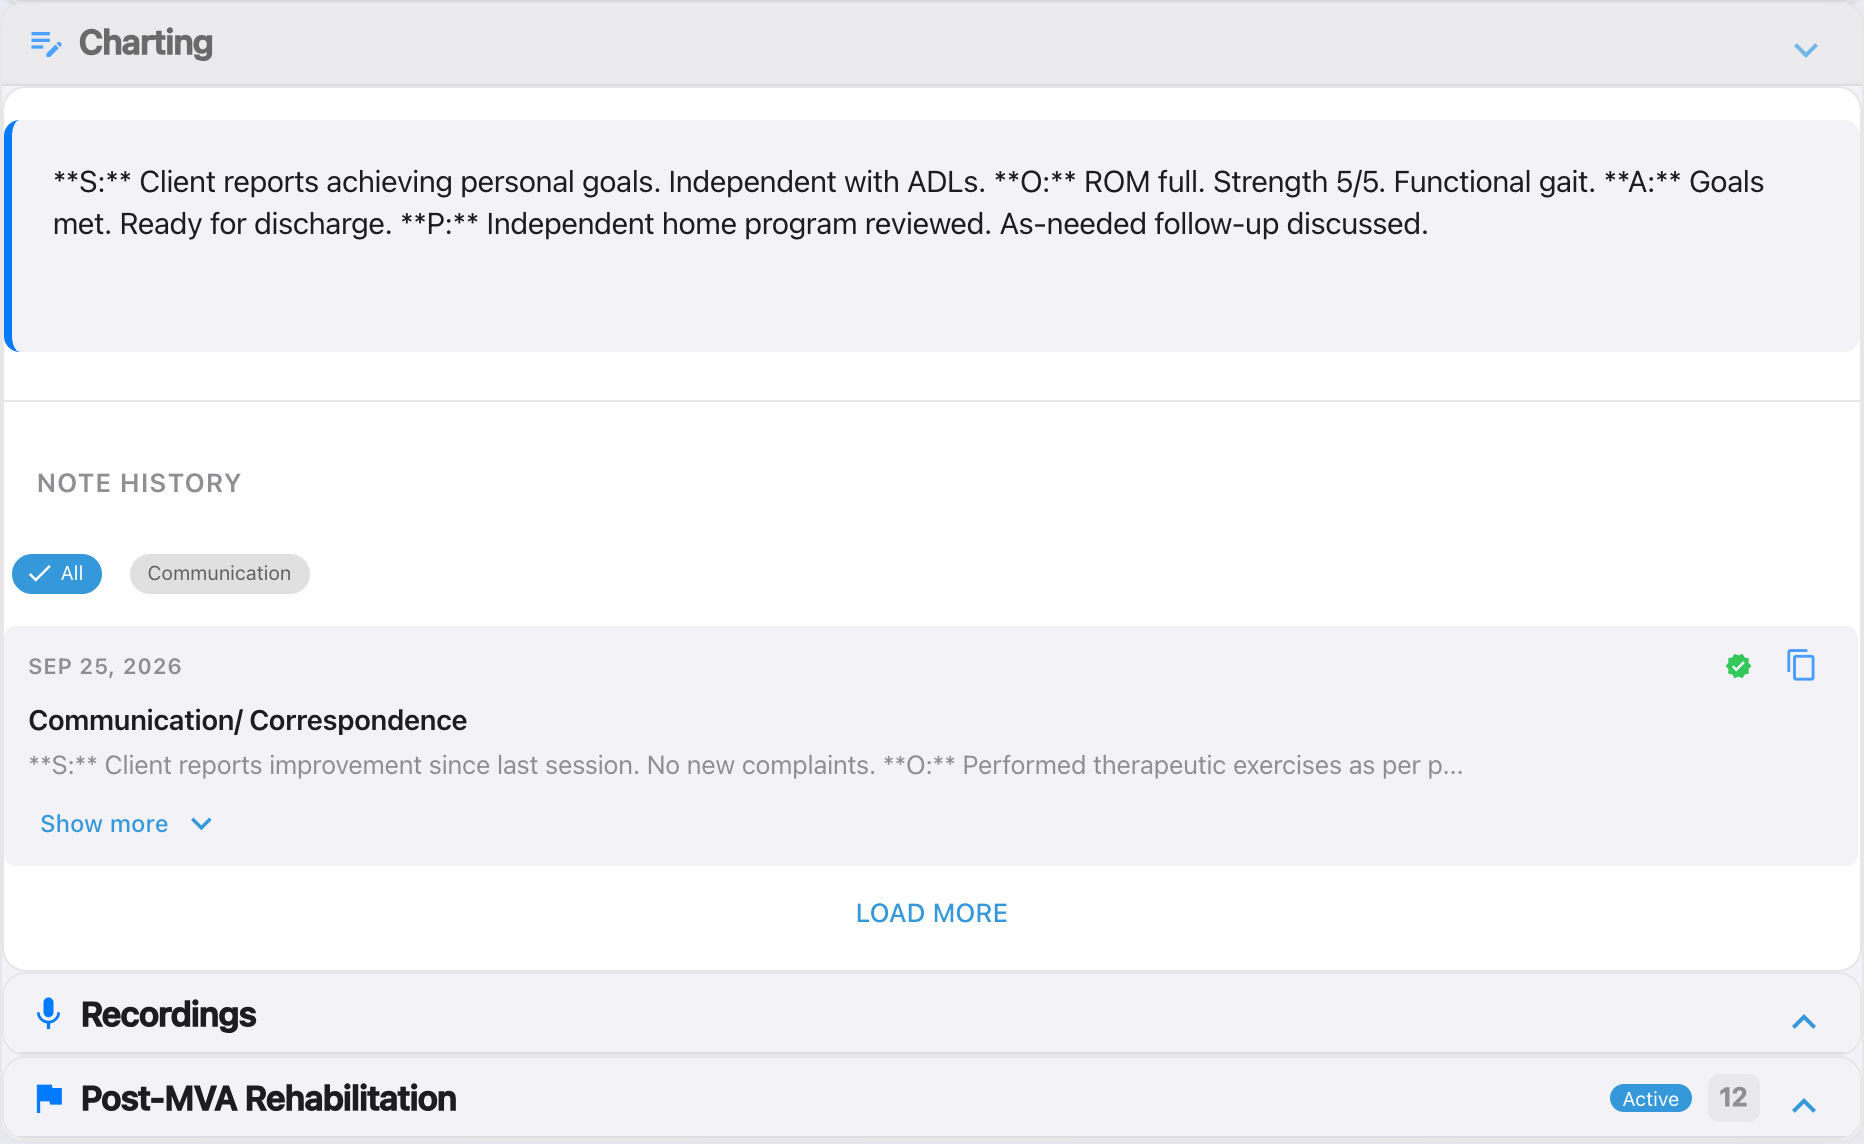
Signed chart entry displayed with a green completion icon

Completion cues

  • The signed chart entry is locked from further editing.
  • A green completion icon appears with the history item.
  • The appointment no longer shows the note/signature requirements for that completed entry.

If a requirement remains

Return to the appointment’s Charting section and review the status labels. Check the current visit’s own status labels instead of relying on completion icons from older history items.

Open appointment
Start entry
Chart the visit
Review status
Save or sign

Related workflows

Use the right workspace for the job

Reference

This guide covers charting from one regular allied-health appointment. These adjacent tools support different work patterns.

Quick reference

Appointment page → Charting → New Chart Entry
Choose free text or a reusable template. Type / for structured observations. Review the appointment’s remaining requirements before choosing Save or Sign & Save.

When controls differ

Available chart controls can vary by role and by the service’s note and signature settings. If a control is missing, ask your InToday administrator to review the appointment setup with you.